EvenQuads at PRIMES STEP
I love the game of SET, where you have a specialized deck of 81 cards. The image on each card has four features: color, shape, shading, and the number of objects. Each feature can have three possible values. Three cards form a set if, for every feature, the values on the cards are either all the same or all different. One of the best properties of the sets is that, given any two cards, we can calculate the third card that would complete a set.
If we look at the game mathematically, we can assign a number 0, 1, or 2 for every feature value. For example, green could be 0, purple could be 1, and red could be 2. Then, the condition that, given a feature, three cards are either all the same or all different is equivalent to saying that the sum of the values modulo 3 is zero.
A mathematician would wonder, can we make a new game where we take values modulo 4? Each feature value should correspond to 0, 1, 2, or 3. For example, we can add a yellow color corresponding to number 3. The new “set” should be four cards such that the sum of the values modulo 4 is 0. This condition guarantees that any three cards could be uniquely completed into a “set”. But such a game is inelegant. For example, one green, two purple, and one red card will form a set. But one green, one purple, and two red will not. The symmetry between colors is lost.
I decided that there is no good analog for the game of SET that is played modulo 4. I was wrong. Here is a new game called EvenQuads. I heard about it at the 2022 MOVES conference.
The deck consists of 64 cards with three features: color, shape, and the number of objects. There are four values for each feature. Four cards form a quad if, for every feature, the values are all the same, all different, or half-and-half.

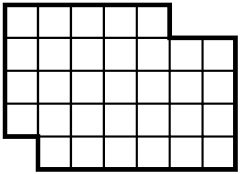
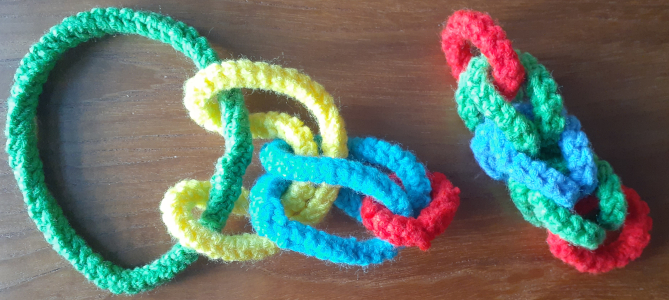
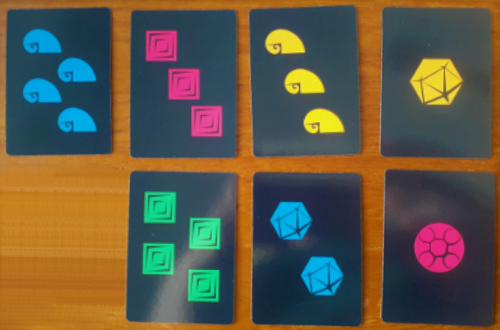
For example, the figure above shows a quad where, for each feature, all values are different. To get familiar with quads, here is a puzzle for you. How many quads can you find in the picture below?
The game proceeds in a similar way to the game of SET. You can find out more about EvenQuads at the EvenQuads website.
I picked this game as a research project for my senior STEP group. As many of you know, I have a program where we conduct mathematical research with students in grades 7 through 9. The group started in the fall of 2022 and was extremely productive. We wrote FOUR papers in an academic year, which is obviously our record. The papers can be found at the arXiv.
- In Card Games Unveiled: Exploring the Underlying Linear Algebra, we analyze four games related to linear algebra: SET, EvenQuads, Socks, and Spot It!. The games are so connected to each other that sometimes it is even possible to play one game using the cards from another game.
- In Quad Squares, we study semimagic, magic, and strongly magic quad squares made out of EvenQuads cards. A semimagic quad square is a 4-by-4 square in which each row and column form a quad. You can guess what a magic quad square is. The idea was inspired by magic SET squares: 3-by-3 squares where each row, column, and diagonal form a set. A magic SET square has an additional property: there are always four more sets in such a square located on broken diagonals. In other words, consider three cards and their coordinates in a square. These cards form a set if and only if the values of each coordinate are either all the same or all different. This property is stronger than the definition of a magic SET square. In the case of the game of SET, these two definitions are the same. However, for EvenQuads, we get two different definitions. This is how we ended up defining strongly magic quad squares. You can find the details in the paper.
- In EvenQuads Game and Error-Correcting Codes, we describe error-correcting codes based on a set of EvenQuads cards.
- In Maximum Number of Quads, we calculate the maximum possible number of quads, given n cards from an EvenQuads deck. For example, the puzzle pictured above is actually an example of the maximum possible number of quads among 7 cards. We generalize this idea to decks of any size. Unfortunately, our formula is based on a conjecture. Though, we strongly believe that our formula is correct.
My students did a great job.
Share:
